Back in 2016, Awakening Church used a single Blackmagic Pocket Cinema Camera with a Teradek VidiU to stream to our own self-hosted live video server. Times have changed! We now have a multi-camera production with live switching to make it easier to produce videos every week.
I’ll share some details of our live studio PC and how you can create your own to have high-quality live streaming without the typical high cost.
We are a mobile church which needs to setup and teardown every week. Many aspects of our design choices are made to make it as easy as possible to setup and tear down every week.
Background
Before our latest 2019 build, we used a custom computer built in 2017. This computer worked well but each camera required a lot of cables: power, SDI, and VISCA in/out. This made cabling heavy and cumbersome to setup. Additionally, the PC was in a standard case, which means we had to setup all cabling from scratch every week.
This computer was stolen in late 2019. We thankfully had insurance which covered the cost of building a replacement. For the replacement, we decided to improve on these aspects of the design.
Requirements
- Entire system easy to assemble and store
- Operation by a single volunteer — this means remotely controlled cameras
- Save money over commercial systems costing $8K+
- Reduce cable needs
Our 2019 build
We use Vimeo Premium and its bundled Livestream Studio switcher for video production, so the entire computer is built to run this program. The software requires hardware acceleration for best performance, so we chose a processor with an integrated GPU which supports Intel Quick Sync video to offload some H.264 encoding and decoding tasks.
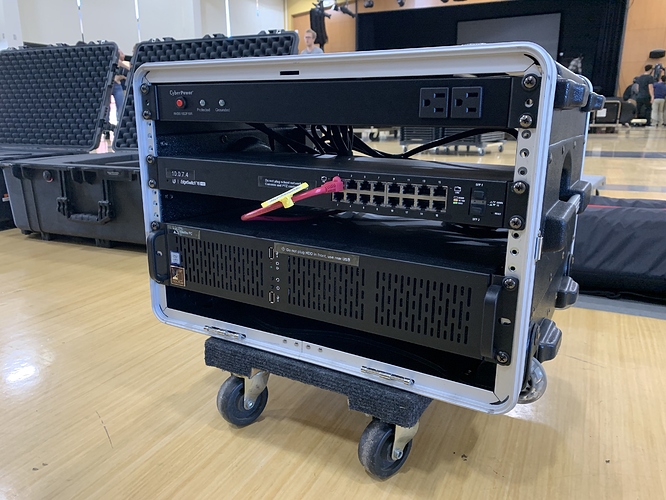
We also adopted NDI|HX cameras which can handle power, network control, and H.264 video all in a single Ethernet cable. We no longer need a capture card for every camera, but we still need one for capturing ProPresenter slides. We use a rackmount design to allow the computer to remain in a portable rack alongside a PoE switch and PDU. This lets us easily setup and teardown the system every week.
Here’s a picture of the portable PC rack:
The EdgeSwitch is for the camera network. The switch provides power to the cameras and a PTZ controller which makes it easy to move the cameras. You could also just use the PTZ controls within Livestream Studio to save more on costs.
Here’s the part list, including the switch, PDU, and Gator rack:
(We already had a donated 150W EdgeSwitch, so the cost isn’t included in the above list.)
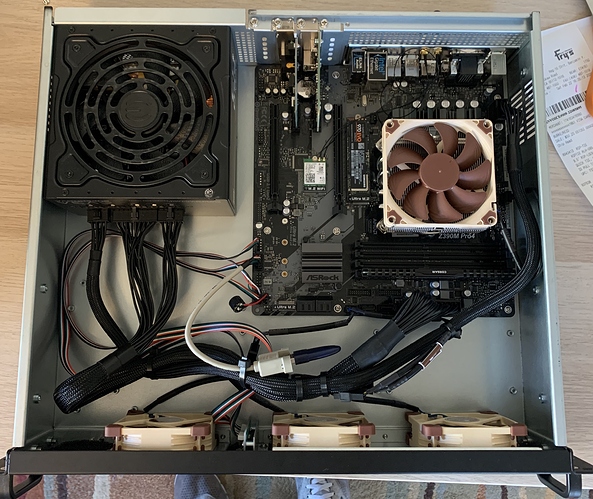
Here’s the interior:
(Recent additions in the above photo not included in the part list are an internal hardware license USB dongle and onboard Wi-Fi.)
Performance
This system performs well for a fraction of commercial system costs. The Intel i7-9700 includes an integrated GPU with Intel Quick Sync video which hardware accelerates H.264 encoding and decoding in Livestream Studio.
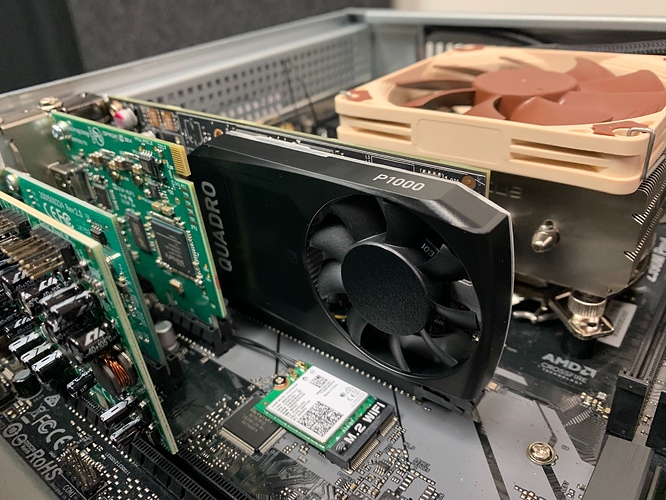
After adding a third NDI|HX camera, we’re starting to hit the limits of performance of this system when also used with a computer HDMI input which requires conversion. I’m planning to add a dedicated GPU this week to add additional hardware H.264 encoder and decoder engines.
Summary
The rackmount setup in a portable case is ideal for setup and teardown. Using NDI|HX takes more compute resources but really reduces the amount of cabling. And the machine is very easy to build with commonly available parts.
I hope you’ll consider our setup when considering your options for creating a robust build for live production switching. In future posts, I’ll share more about our entire studio setup!


